Configure Webhook URLs
Steps to be followed to utilise the Webhooks
Implementing Webhook Handler
- You need to create a publicly accessible webhook endpoint for IDWise to send notifications to.
- This webhook endpoint will receive a JSON payload every time a new notification is triggered.
- The JSON payload will contain the details of the notification
- The webhook endpoint created for IDWise might be triggered multiple times for the same journey.
- It is essential to ensure that the handler is designed to handle such scenarios.
- Your handler code needs to be idempotent (where multiple identical requests have the same effect as a single request, meaning that the API has the same result whether it is called once or multiple times.)
Setting Up a Webhook on IDWise Portal
Follow these steps to set up a webhook on the IDWise web portal:
1. Access the Webhook Section
- Navigate to the IDWise web portal.
- Go to the "Admin" page.
- Select the "Webhook" tab.
2. Initiate Webhook Creation
- Click on the "Create a Webhook" button.
3. Enter Webhook Details
-
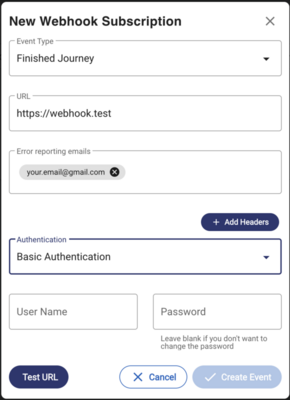
A form will appear, prompting you to fill in the webhook's details. Complete the following fields:
3.1. Event Name:
- Select the desired event name from the dropdown.
3.2. URL:
- Input the URL where you'd like IDWise to send the webhook data.
3.3. Email (Optional):
- Provide an email address if you'd like to receive notifications when IDWise is unable to deliver the webhook data after three attempts.
3.4. Basic Authentication (Optional):
- If your webhook requires basic authentication, enter the "Username" and "Password" for authentication.

3.5. Additional Authentication:
-
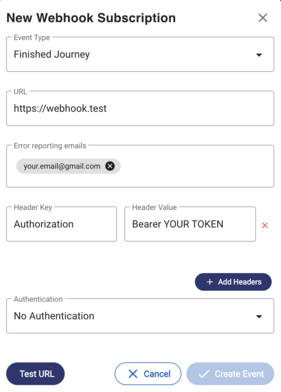
If you use a different authentication mechanism, you can specify it using headers.
-
Click on "Add Header" to add the necessary headers. For instance, if you want to set bearer authentication, you can add the appropriate headers here as shown in the image below.

4. Test URL
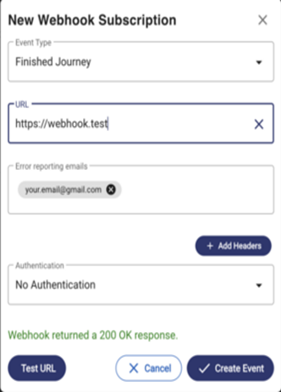
- Click the "Test URL" button to test your URL, it should return 200 to allow you to create your event.

5. Finalize Webhook Setup
- Click the "Create Event" button to save and activate your webhook.
Experimental webhook (for testing)
You can also use a website called https://webhook.site/ to get a webhook that you can use during the development and testing phase (on top of your app webhook); IDWise supports adding multiple URLs as webhooks.
Updated 5 months ago
