Using Custom Fonts in IDWise SDK
To integrate a custom font into your application, please follow these steps:
-
Go to Theme Designer and provide the font name in the properties
Font Family (Android)andFont Family (IOS). For example "roboto". Note here that you should specify the Font Family name and not add the file extension (ttf or otf) in this configuration. You can use the same font or different fonts for each platform: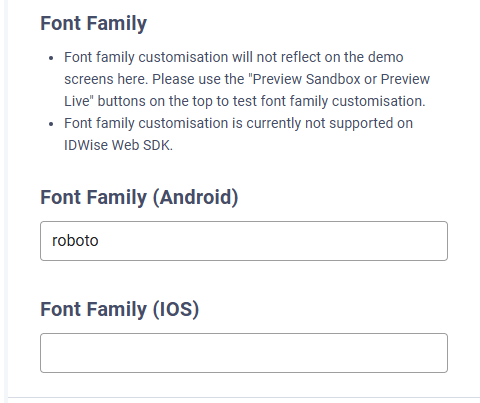
-
You need to embed the font files in your app. You may need to supply font file for each style for example "roboto-Regular.ttf", "roboto-Bold.ttf". To embed the font files, follow the steps depending on your platform:
infoOn iOS, the font name may differ from the font file name. To find the actual font name, use the following iOS code snippet.
for family in UIFont.familyNames {
  print("\(family)")
  for name: String in UIFont.fontNames(forFamilyName: family) {
    print("== \(name)")
  }
}
Android
- Add font file in the project's font directory. For example
app/src/main/res/fonts/roboto.ttf.
iOS
-
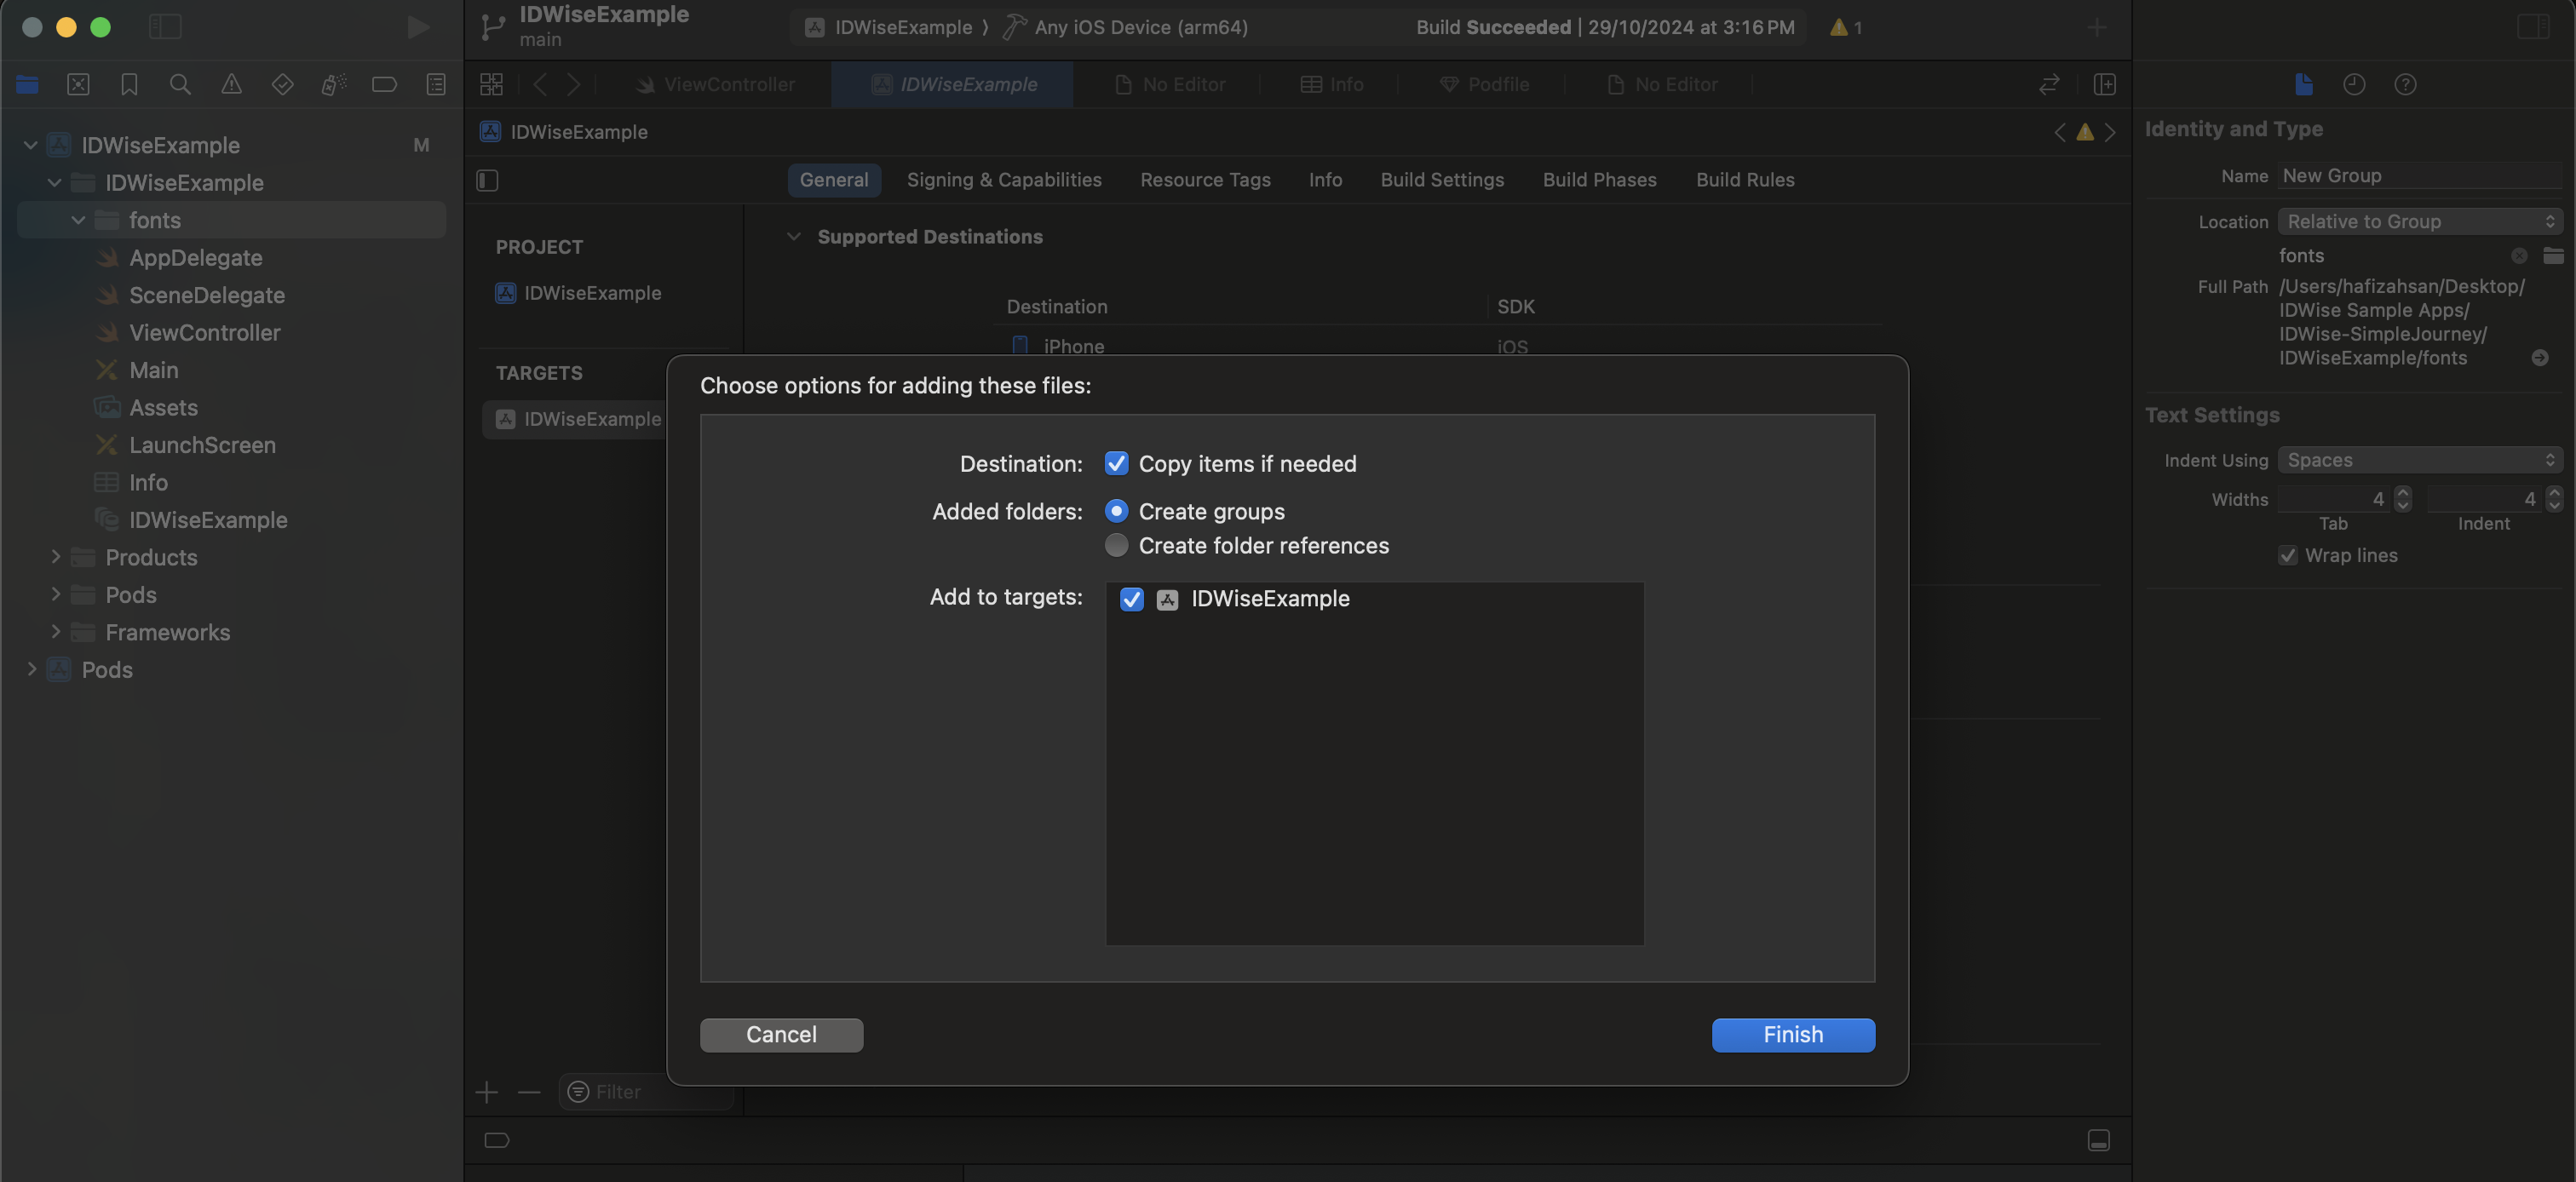
In your iOS XCode project, Add the font file to your XCode project. Select
File > Add Files to <Your Project Name>from the menu bar, or drag the font file fromFinderand drop it into your XCode project. -
Make sure the font file is a target member of your app:
-
You need to make
fontsgroup/folder in your project under your project directory as shown below:
-
Register Your Font File with iOS. After adding the font file to your project, you need to let iOS know about the font. To do this, add the key
Fonts provided by applicationtoInfo.plist(the raw key name isUIAppFonts). XCode creates an array value for the key; add the name of the font file as an item of the array. Be sure to include the file extension as part of the name as shown in the following screenshot: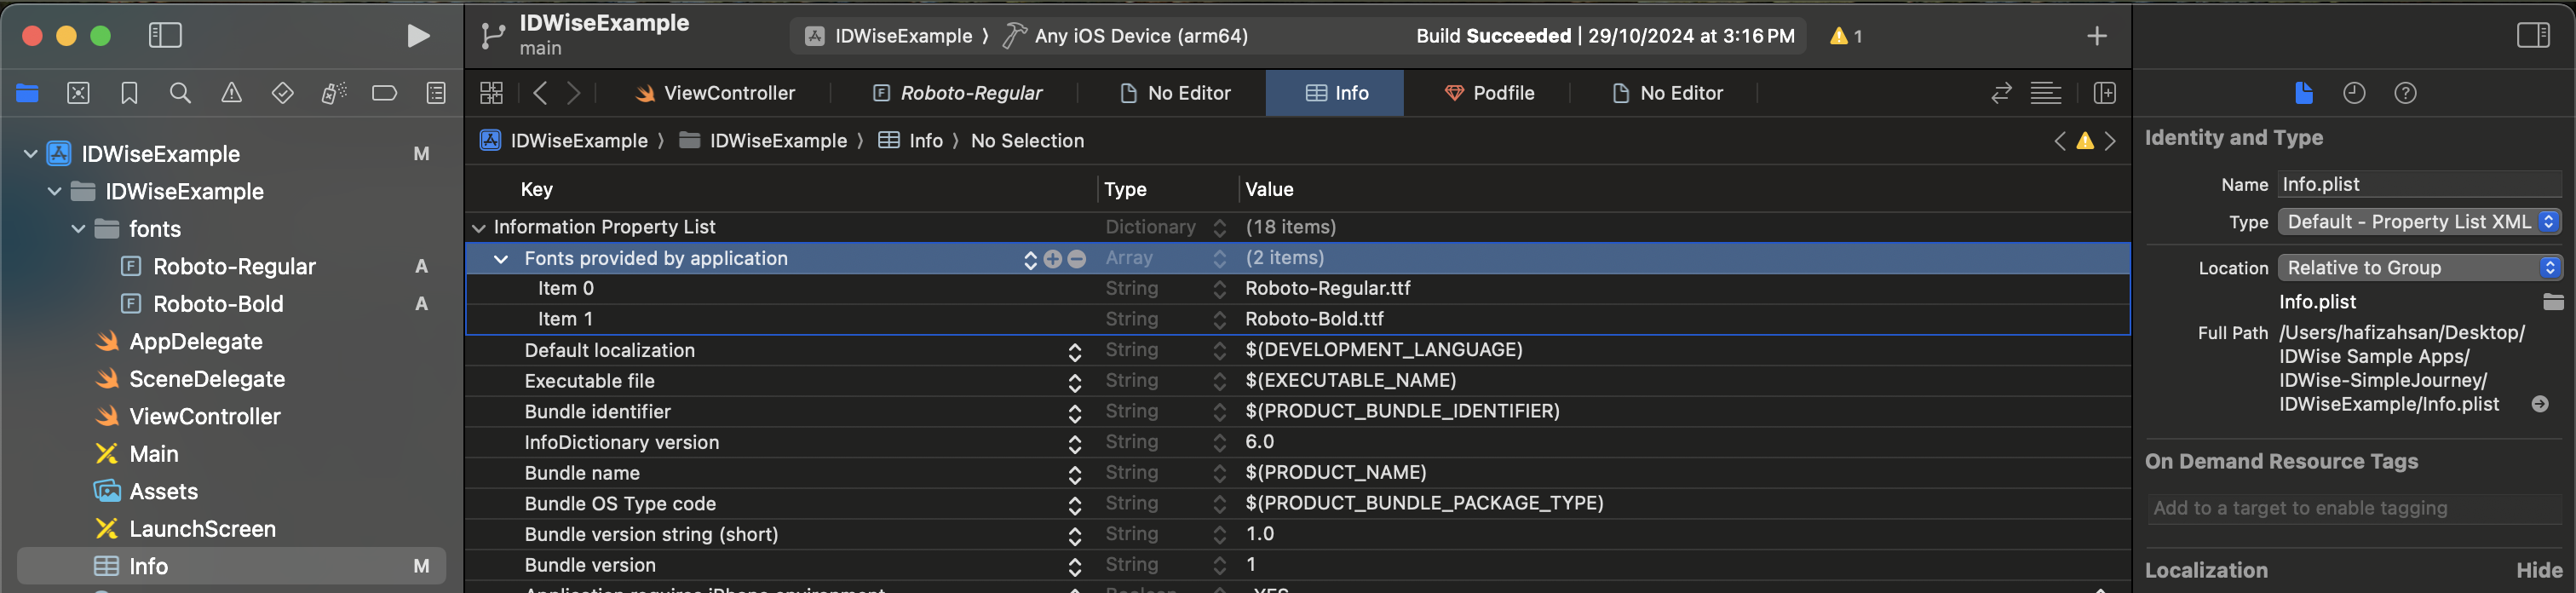
-
Each font file you add to your project must be listed in this array covering all the needed styles.
Flutter
You need to embed the font in both your generated Android Studio project and XCode project so the font works both for your Android and iOS app
-
In your Android Studio project:
- Add font file in the project's font directory. For example
app/src/main/res/fonts/roboto.ttf
- Add font file in the project's font directory. For example
-
In your iOS XCode project:
-
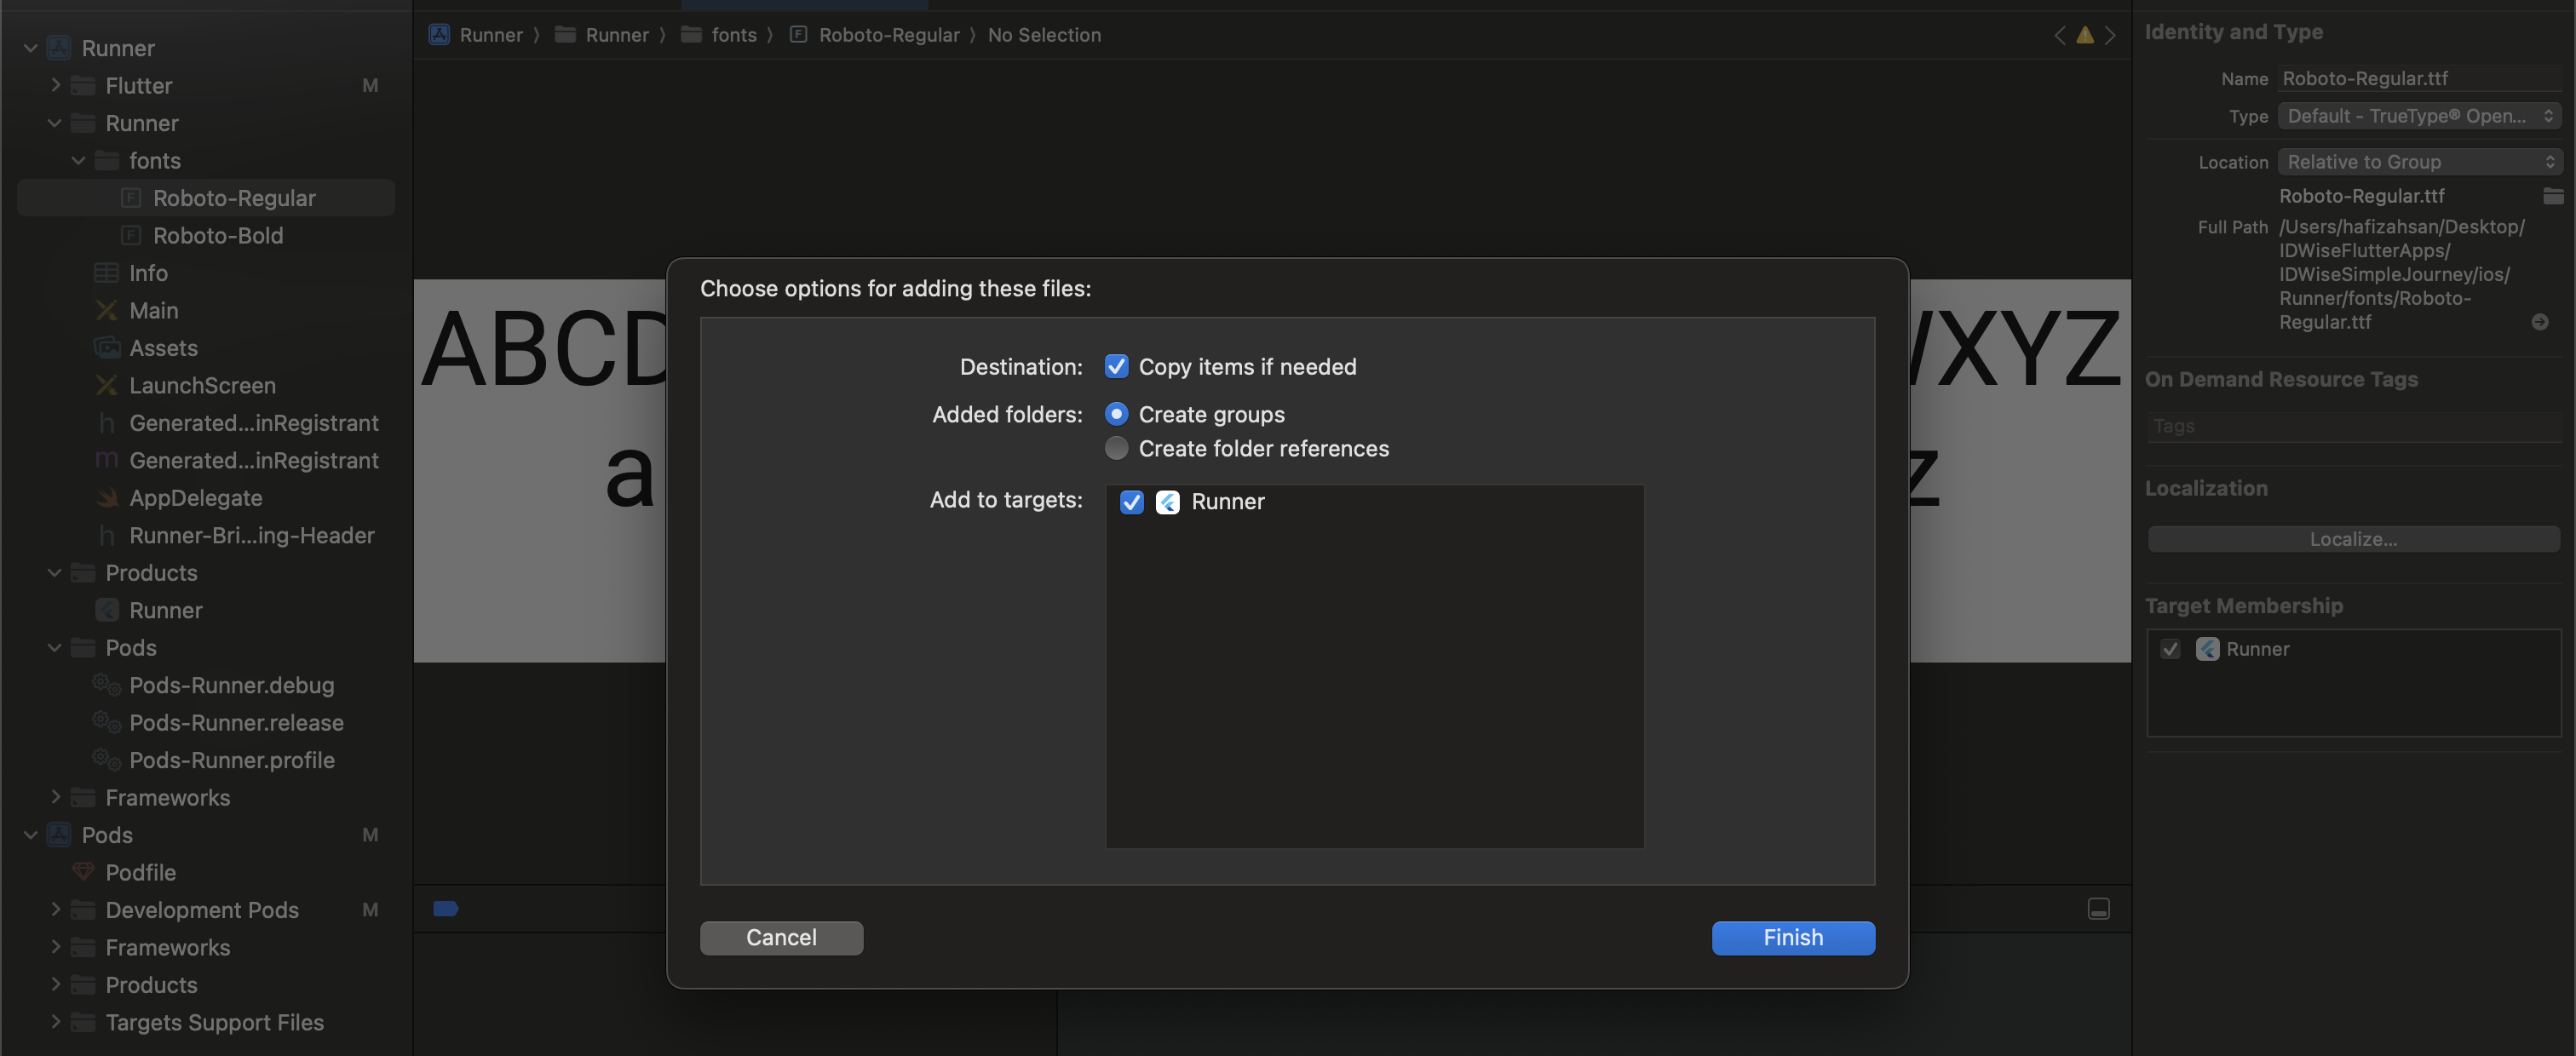
In your iOS XCode project, Add the font file to your XCode project. Select
File > Add Files to <Your Project Name>from the menu bar, or drag the font file fromFinderand drop it into your XCode project. -
Make sure the font file is a target member of your app:
-
You need to make
fontsgroup/folder underRunnerdirectory as shown below: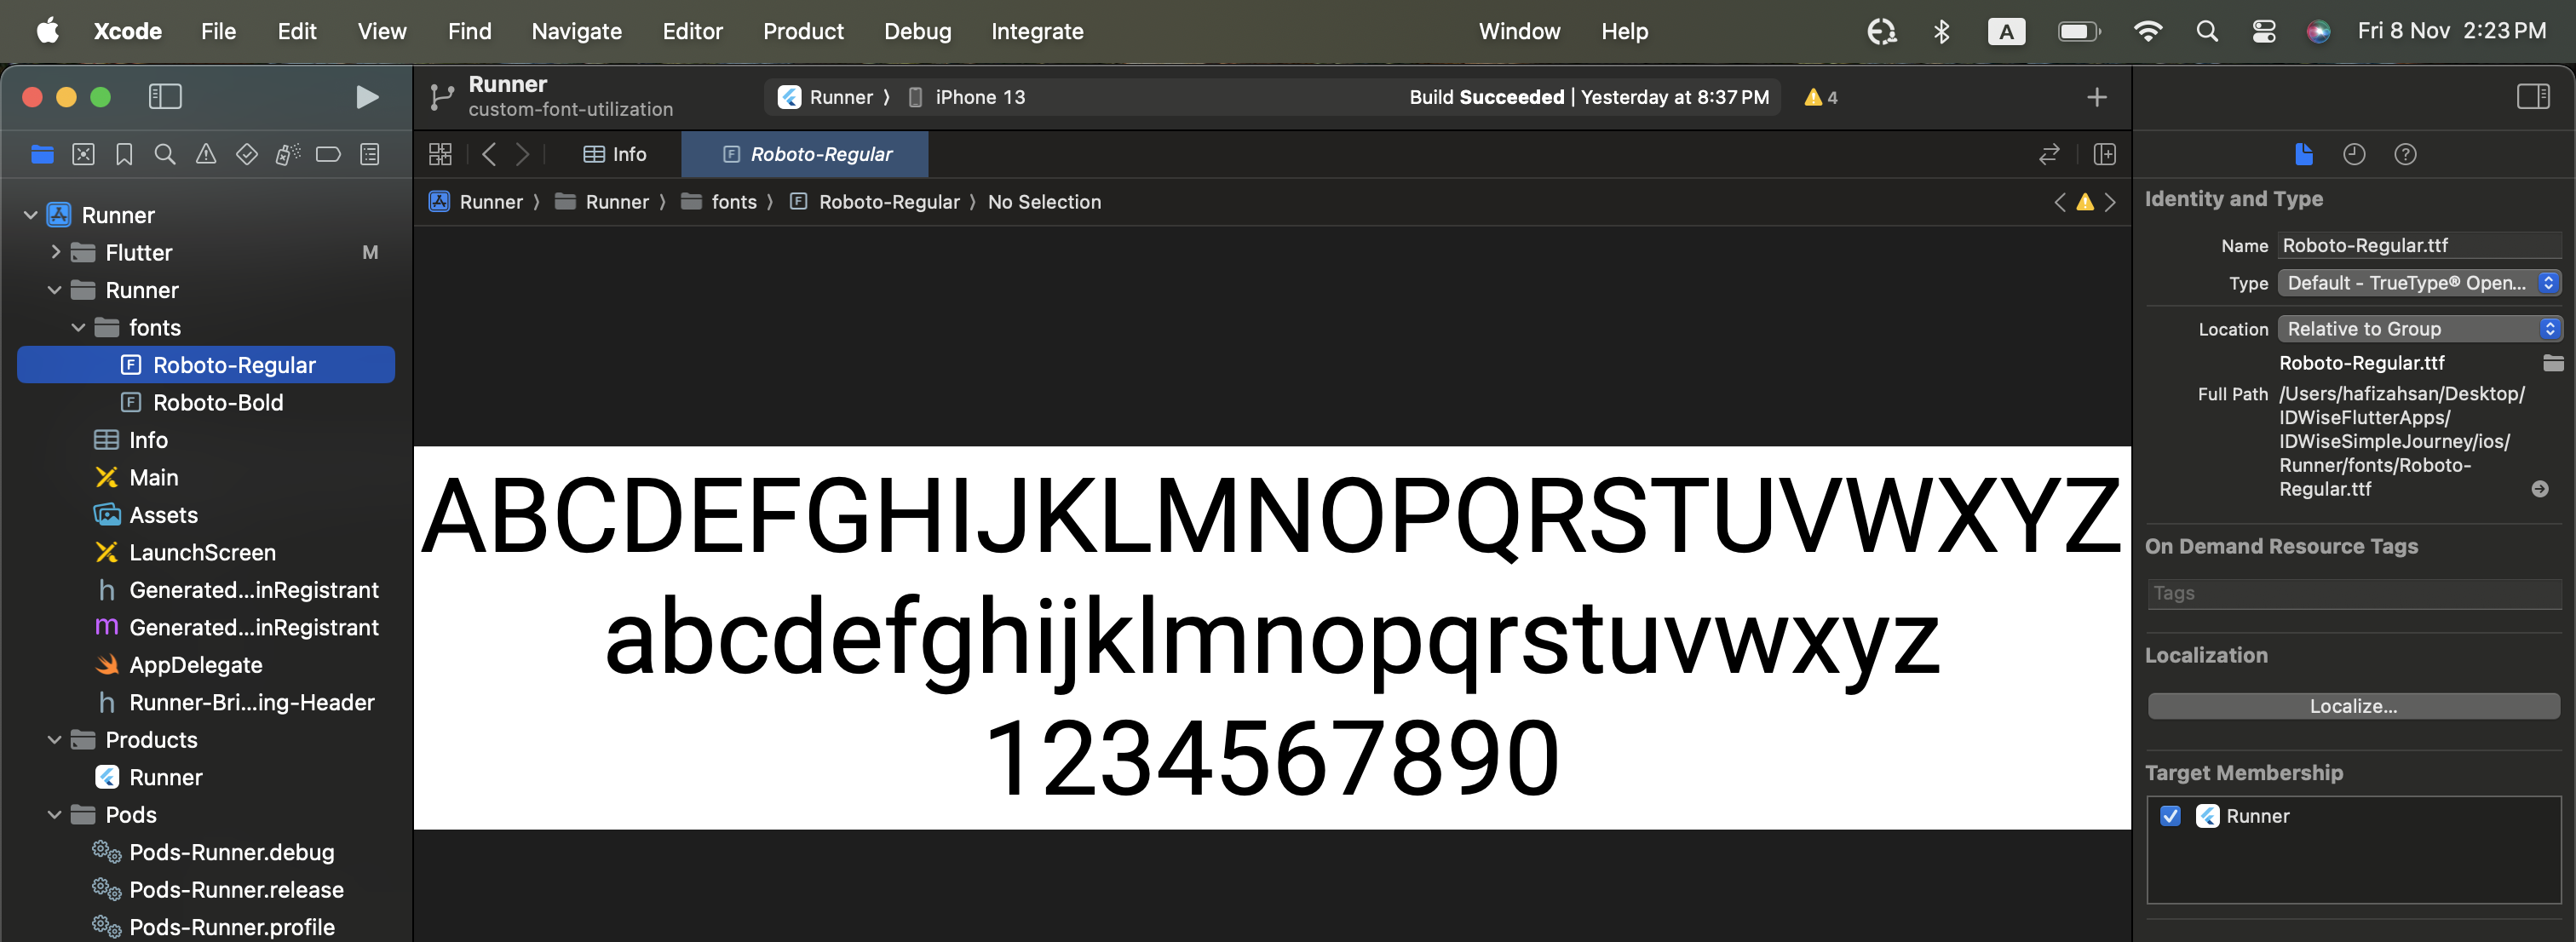
-
Register Your Font File with iOS. After adding the font file to your project, you need to let iOS know about the font. To do this, add the key
Fonts provided by applicationtoInfo.plist(the raw key name isUIAppFonts). XCode creates an array value for the key; add the name of the font file as an item of the array. Be sure to include the file extension as part of the name as shown in the following screenshot:
-
Each font file you add to your project must be listed in this array covering all the needed styles.
-
Web
NoteCustom fonts are supported on Web SDK but the font size adjustment is not currently supported.
In the Theme Designer you can specify the Font Family for both the Title and Detail text fields.
- Navigate to the Font Family section.
- Provide the appropriate URLs for your desired fonts.

Supported URL Formats
We currently support two URL formats for font embedding:
- Google Font Embed links,
- Example: https://fonts.googleapis.com/css2?family=Poppins&display=swap
- The Font Family field will be populated automatically.
- Self-Hosted WOFF2 URLs
- Example: https://fonts.gstatic.com/s/poppins/v22/pxiEyp8kv8JHgFVrJJfecg.woff2
- The Font Family must be manually specified.
Notes:
- If the provided URL is valid, the updated font will be immediately reflected in the Theme Designer preview.
Updated 10 months ago