Selfie Module Block Configuration
This section allows you to configure the selfie verification step, an essential part of user identity verification.
Configure Step Level Checks
- Liveness Check: (Enabled by default) Incorporate a liveness test to ensure the user is present, adding to the integrity of the verification.
Step Level configurations
Here you'll be able to customize the configuration for your Selfie step and how this step shall behave.
- Session Recording: (Disabled by default) Choose to capture a video during the selfie process for an added layer of verification, available across various SDK, note that additional fees may apply when using this feature.
- Mandatory: (Enabled by default) Designate the selfie as a required step, ensuring a complete and secure verification process.
- Allow File Upload: (Disabled by default) Provide users with the option to upload a selfie or use live capture for greater flexibility, note that such toggle should be used with extreme caution as accepting File-upload images increases the level of risk of fraud.
User Interface Content Customization:
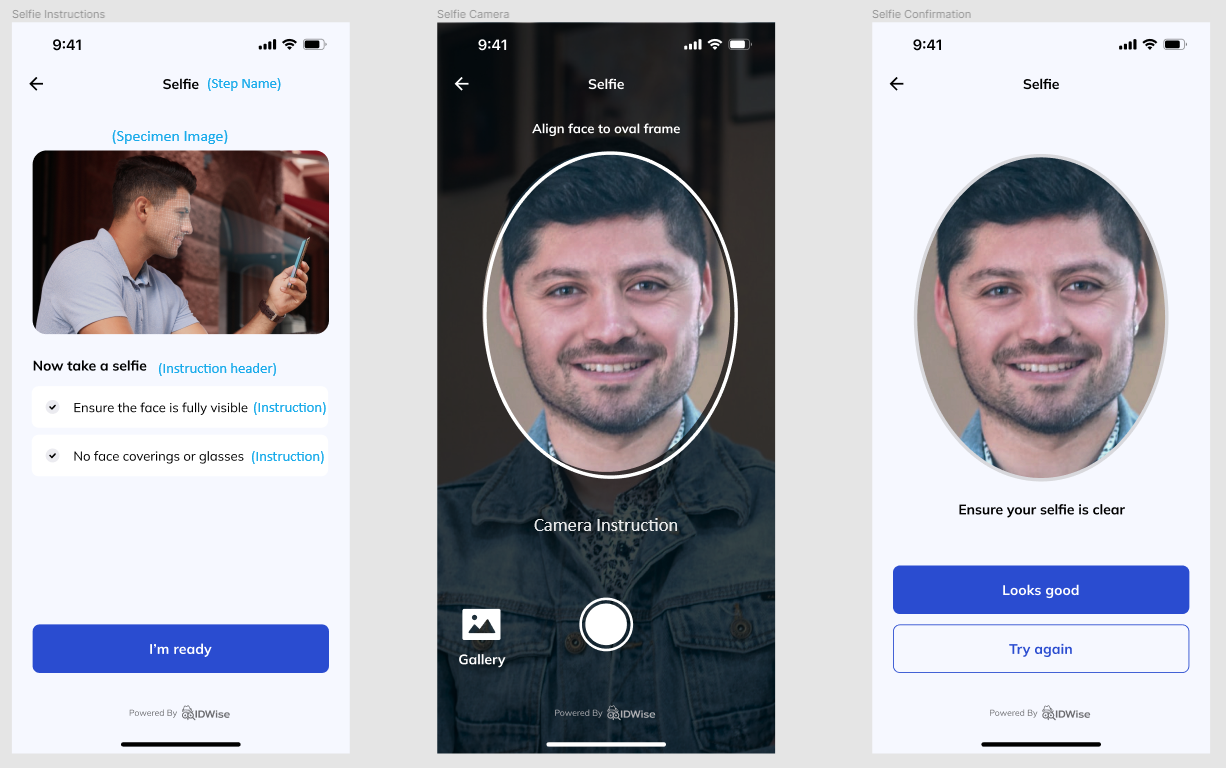
Each step of the onboarding process includes three primary screens:
- Instruction Screen: This screen provides necessary guidance to the end user before beginning the selfie step. It includes:
- Step Name: Such as "ID Document" or "Passport." It is recommended to keep this name to a maximum of two words.
- Specimen Image: A visual representation showing what the user needs to scan during this step.
- Instruction Header: A title for the instruction, e.g., "Now Take a Selfie"
- Instruction Bullets: Detailed instructions specific to this step.
- Camera Screen: This screen is designed for document/selfie capture. The main customisable text here is the Camera Instruction.
- Confirmation Screen: all the text in this screen can be customised from the Theme Designer portal.
The image below displays all screens in the same order from left to right: Instruction Screen, Camera Screen for the front, Confirmation Screen, and Camera Screen for the back.
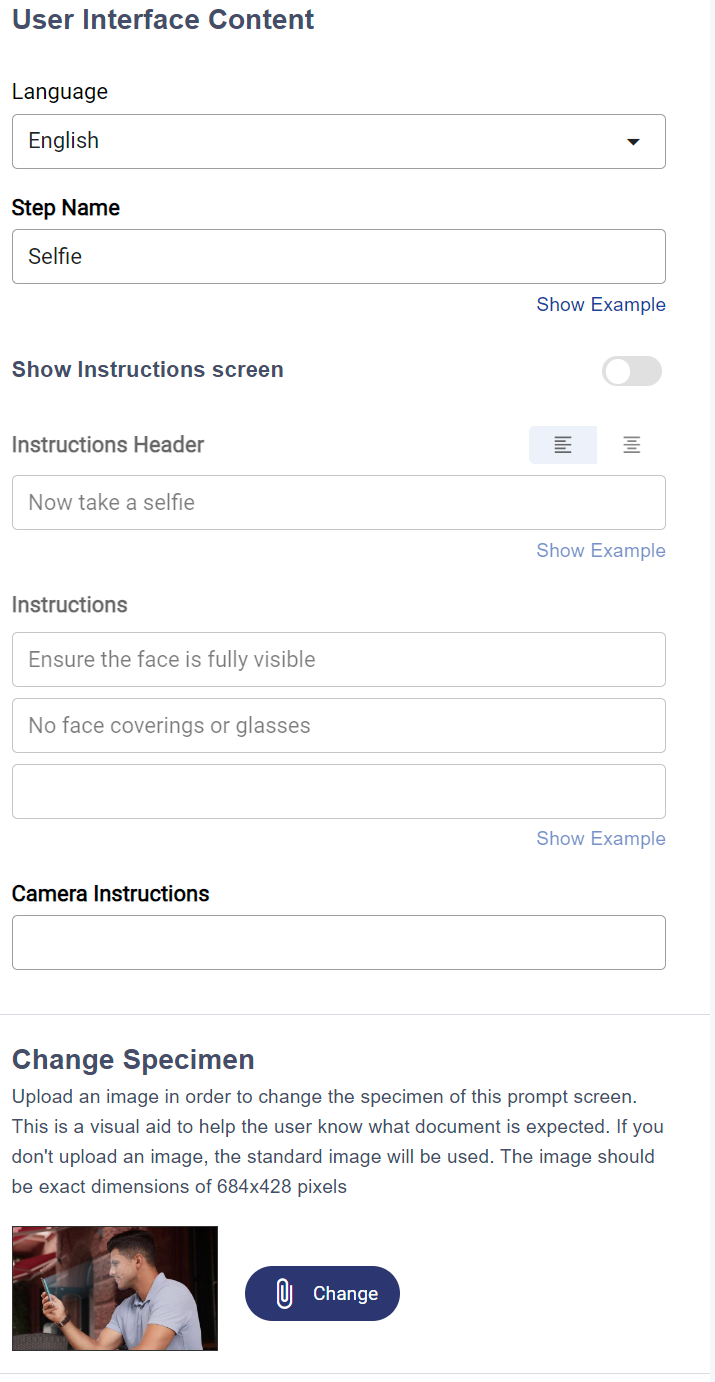
Configure UI Content for a Specific Step
The image below illustrates the UI content configuration for each step in the Flow Builder. Here, you can set up all the text for the screens mentioned above. If you wish to include multiple languages in your UI, you can select the desired language for configuration in this section.
Updated about 2 months ago