Flow Builder
A helper guide to understand IDWise Flow Builder
What is the Journey Flow?
A journey flow in IDWise is the predefined sequence of steps a user follows to complete the identity verification or authentication process. This flow is critical in guiding users through a seamless and secure process to establish their identity.
Types of Steps in a Journey
-
Document Step: Involves the user capturing and uploading an image of their identity document, such as a passport, driver’s license, or ID card. This step verifies the authenticity of the document and extracts relevant information.
-
Proof of Address Step: Involves the user capturing and uploading an image for proof of their current address this can be a variety of documents, see all support documents on Proof of Address here.
-
Selfie Step: Requires the user to capture and/or upload a live photo of their face. This step is crucial for biometric verification and ensuring the person presenting the document is its rightful owner.
-
Anti Money Laundering - (AML) check (Require an additional charge): In this step, we locate the user information from the document step processed, and we start looking it up across AML, PEP, and Sanction lists, note that this step may require some additional set up from our Support team.
Each step within the journey flow is customisable, allowing for specific rules and options such as allowed document types, document sides to be captured, selfie instructions, and face match thresholds.
For configuring these options, refer to the Journey Flow Builder App.
Supported Modules
- Identity Document module: Verifies various identity documents for authenticity and extracts data.
- Proof of Address module: Confirms a user's residential address against utility bills or other official documents.
- Selfie module: Uses facial recognition technology to match a live selfie with the photo on an ID document.
- Anti-Money Laundering (AML) Check module : Screens users against global watch lists and databases to prevent financial crimes.
- Government Database module: Verifies user information against government records for additional authenticity checks.
How to Configure a New Flow
Access the Flow Builder App
Start by navigating to the Journey Flow Builder in IDWise platform, if you don't have login details please reach out to [email protected].
Create a Flow
After you sign into the flow builder, you'll find a New Flow button at the top right corner of the screen, as shown in the screenshot below. You should then assign a suitable name to your new flow.
Configure your Flow:
After creating the flow a new screen with three columns will appear
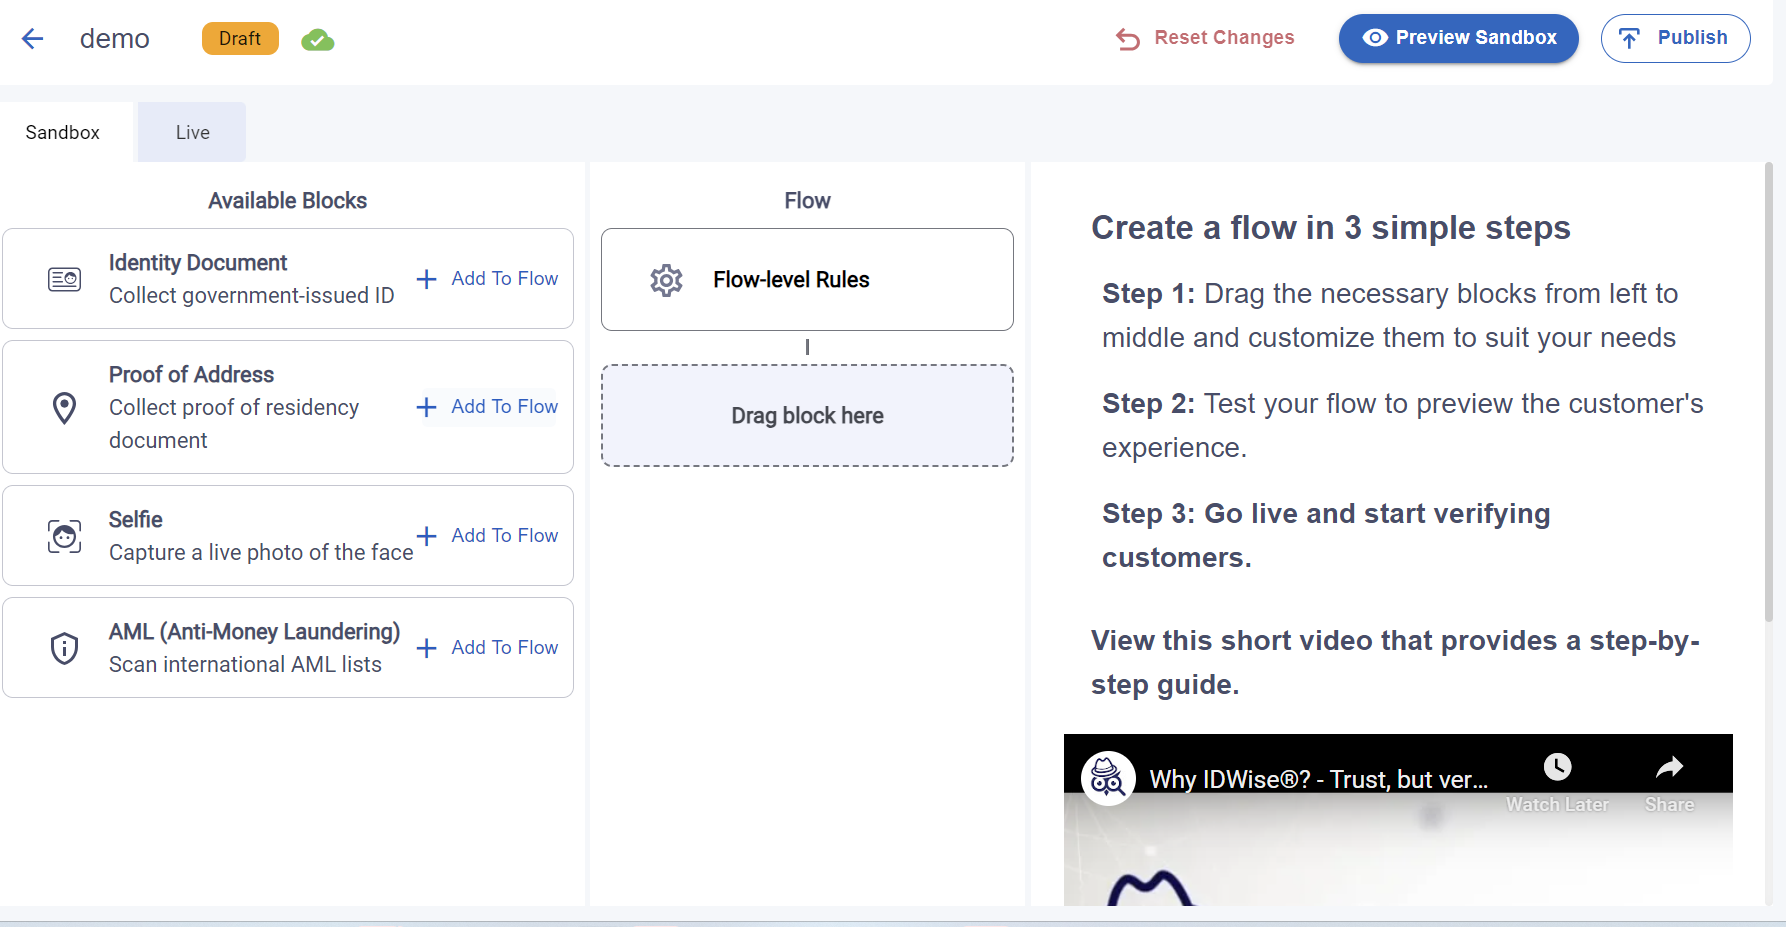
You can set up your flow by dragging and dropping blocks from the Available Block section on the left into your flow. Each block, such as the Document, Selfie, Proof of Address, and AML blocks, can then be configured according to your needs. Further information on how to customize each specific block can be found on the next pages.
As you see from the above screen each flow has two versions:
- Sandbox : This version allows you to adjust your flow without impacting the live environment. Any changes you make will automatically save to the sandbox version, and a green cloud icon will appear at the top, indicating that your modifications have been successfully saved.
- Live: The live version is a read-only configuration of your flow that is actively used in the live environment.
Testing your Flow
Before deploying your flow to the production/live environment, it's crucial to thoroughly test it to ensure that all steps and transitions work seamlessly and as intended. Use a variety of test cases to cover all possible user scenarios, note that all the changes you made reflect on your sandbox, which you can test by clicking on the "Preview Sandbox" button in the top right corner
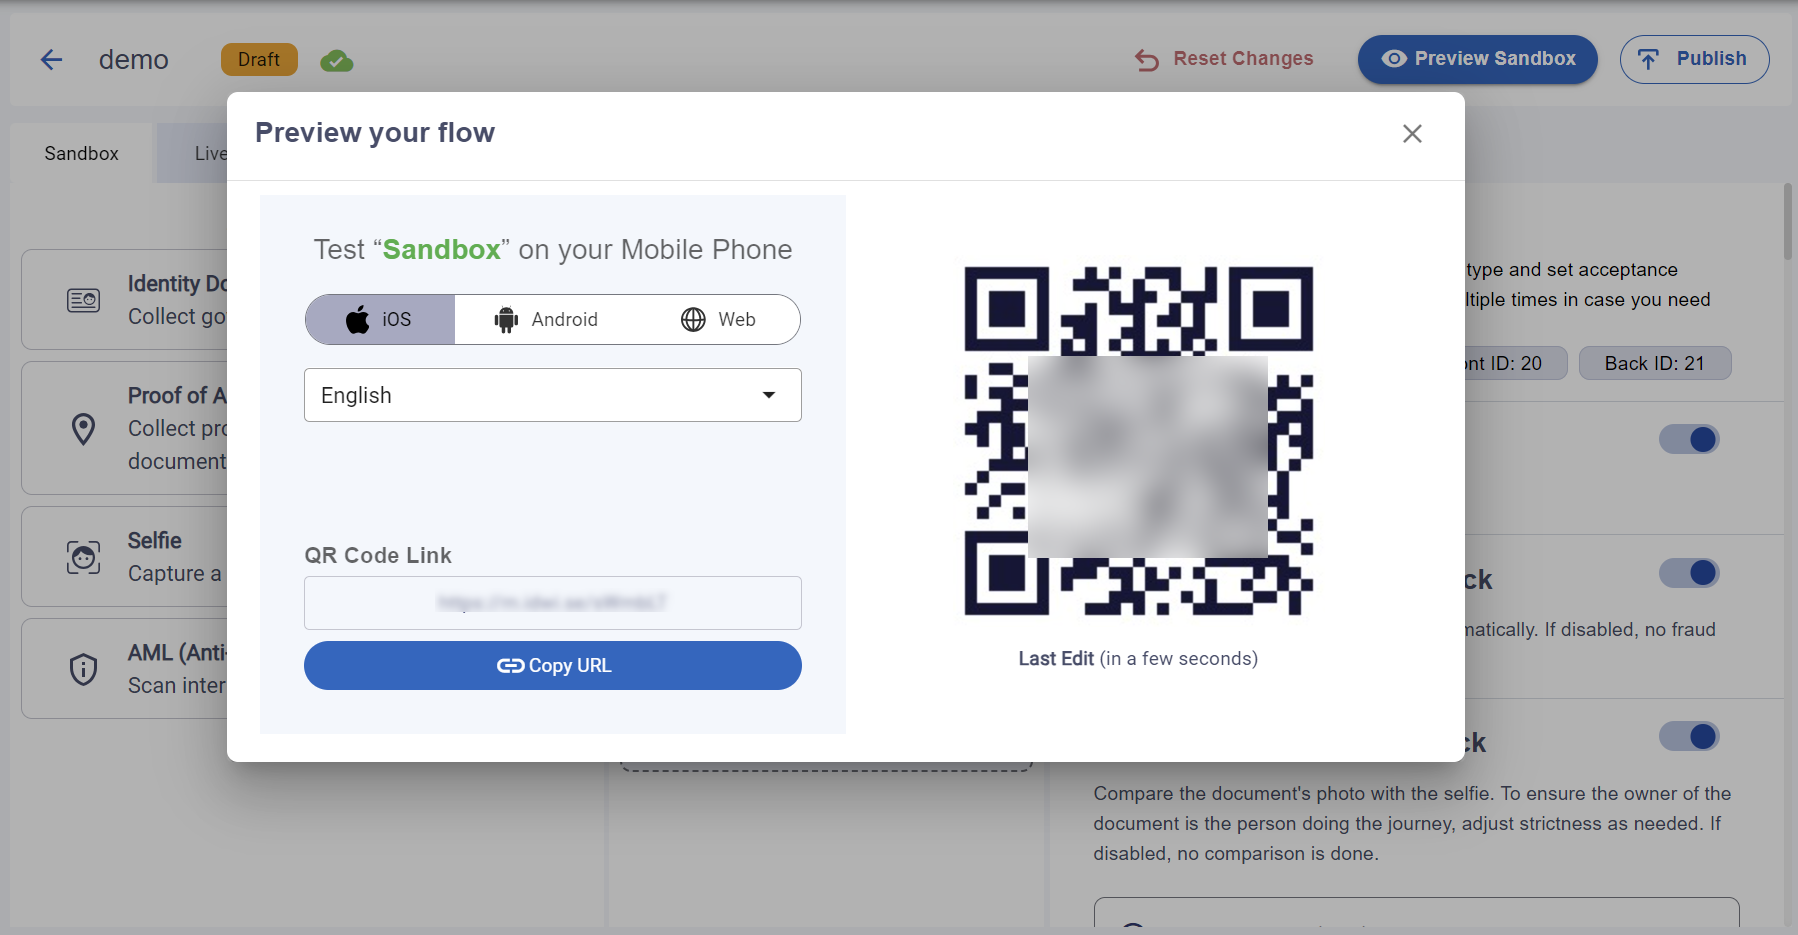
The screen indicates that IDWise's flow testing is available across various platforms, including Android, iOS, and Web. To test on a specific platform, simply choose it and scan the corresponding QR code.
NoteYou can also revert all changes done on Sandbox by using the "Reset Changes" Button.
Publish your Flow to Production
After testing your sandbox flow and making final adjustments, you can publish sandbox to production by clicking the Publish button in the top right corner. Monitor the performance closely at the start to quickly address any issues or user feedback.
Updated about 2 months ago